Cycling pedals are taken for granted by experienced cyclists and viewed with trepidation by new cyclists. What is their function and role, how do you choose a pedal system, and what do you need to know about using them and looking after them?
In the Summer 2019 issue, I touched on pedal systems in “A Guide to Cycling Shoes” as your shoes and pedals function interdependently to transfer force to the crankarms and move you forward. The choice of cycling shoes will influence what pedals you can use, and vice versa. To recap briefly, pedal systems will be broadly categorized as either flat, mountain, or road. Within these 3 broad categories are a range of brands, models, functions and features that can overwhelm a newbie, leading to a Facebook post that says “I just got a new bike – what pedals do I put on it?”.
The answer to this question is not as simple as might be expected, and will be influenced by an assessment of the type of bike; the type of riding the person is doing; their experience and confidence level; and future cycling ambitions.
Pedal Categories
Flat pedals are what we all learn to ride on as a kid, or belatedly as an adult. However Flat pedals (aka platform) are not restricted to kids bikes but show up on lower cost road bikes and mountain bikes, cruisers, hybrids, commuters, e-bikes and some specialty mountain bikes. Flat pedals may be rubber; metal with serrated teeth (great for both traction and nasty shin injuries) or studded to provide grip under foot. Cycling specific shoes are not required. Just get on and ride! Therein lie both the pros and cons.
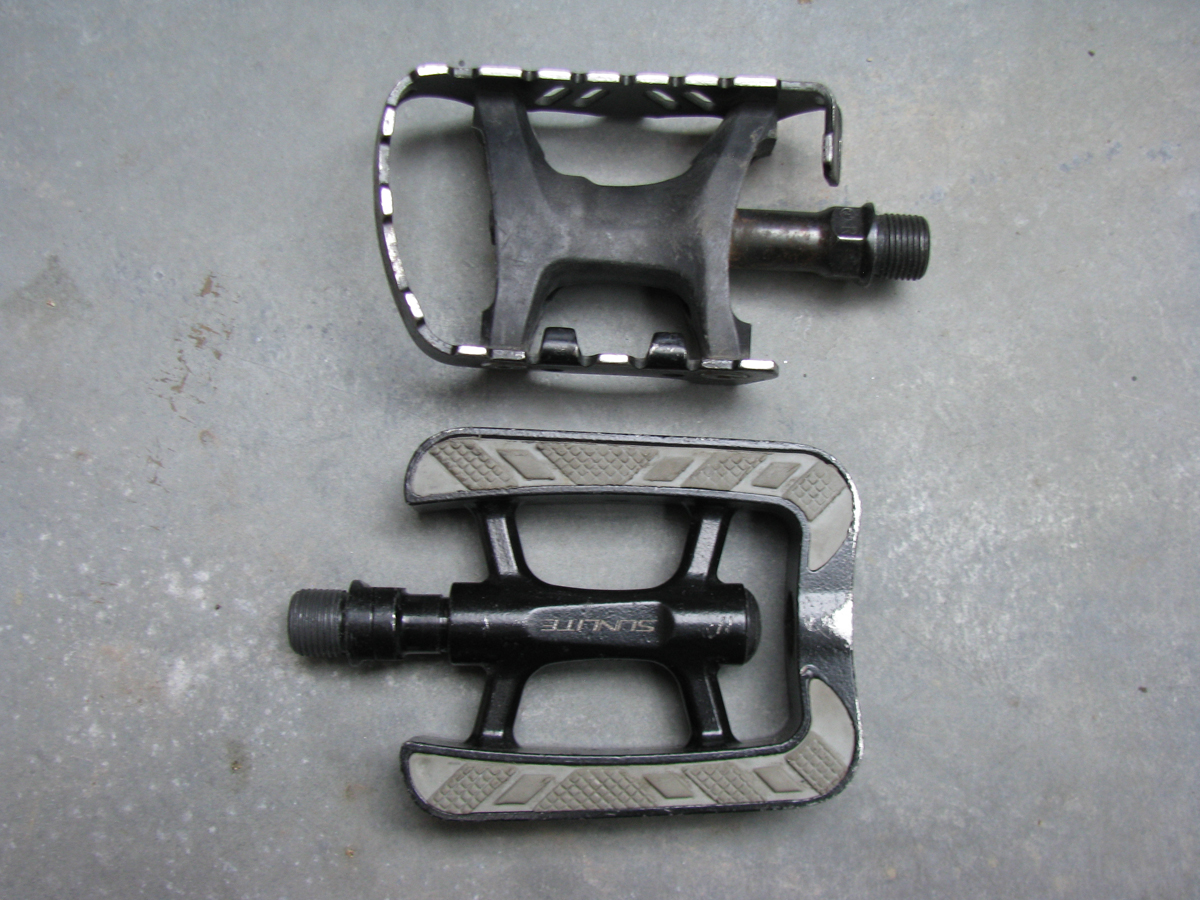
Pros: ease of use, no special shoes required, you won’t fall over and land on your hip while trying to get your feet off your pedals.
Cons: can result in less efficient power transfer, takes skill and practice to stay in contact with the pedals in bouncy conditions (i.e. mountain biking).
A couple of the cons can be addressed by using Powerstraps or Toe Clips to help retain the feet on the pedals. Clips were the performance enhancing advantage of a bygone era, but have been largely replaced by the next two categories of “clipless” pedals. This poorly chosen but common name to describe modern pedals relies on historical knowledge to make any sense of, and I will refrain for using it again!
What defines modern cycling pedal systems are three integrated components: the pedals which attach to the bicycle crank arms; the shoes; and the cleats which are bolted to the bottom of the shoes. Stepping on the pedal connects the cleat to the pedal, mechanically attaching your feet to the bike. There are two broad categories named after the style of bike they are mostly used with: mountain and road.
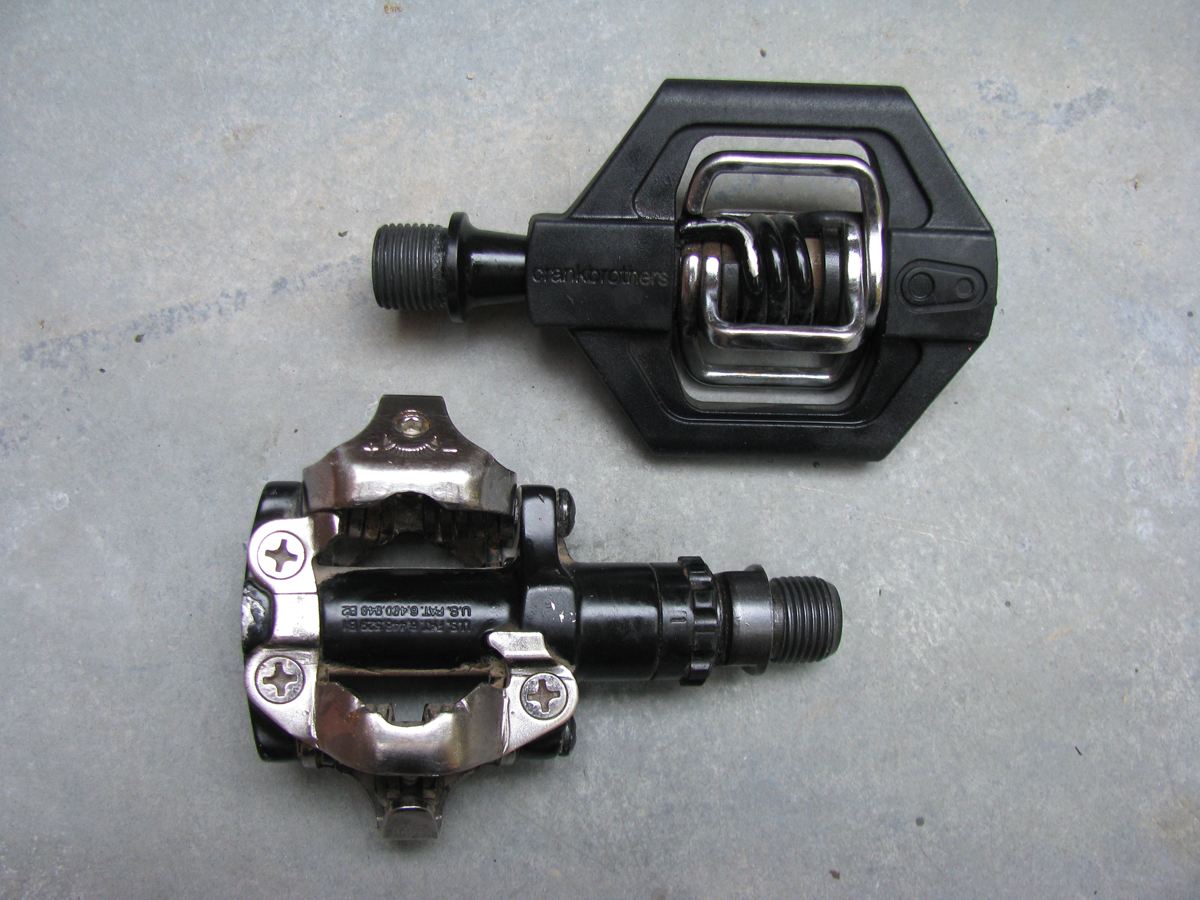
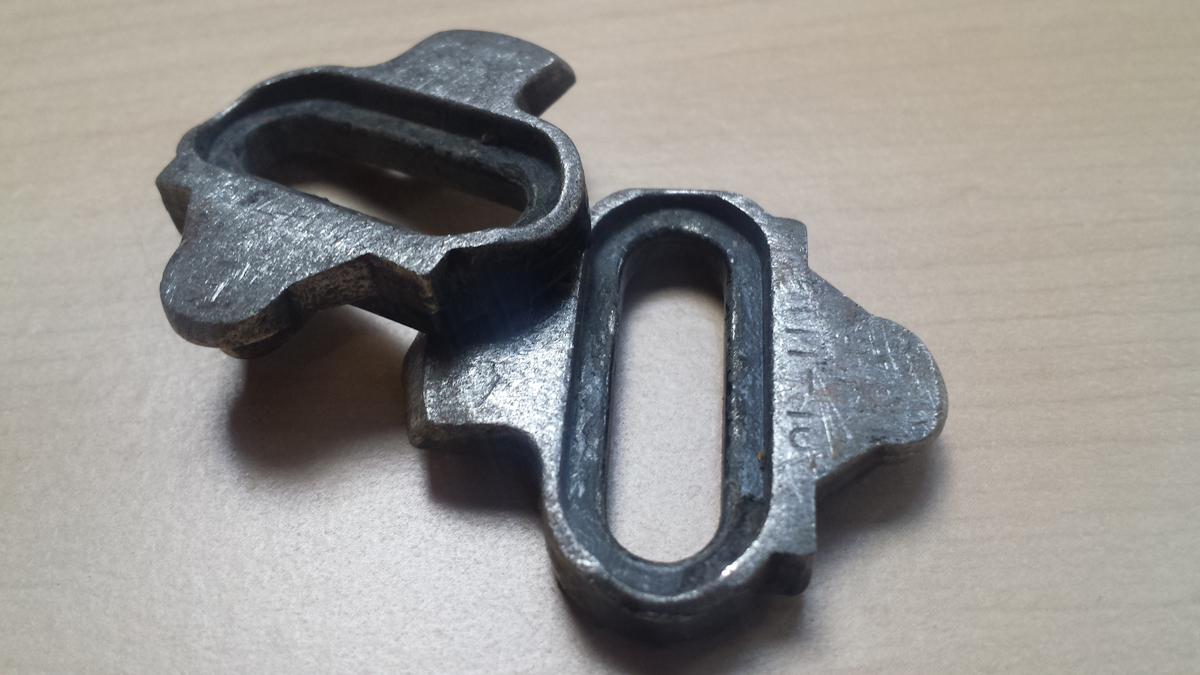
Mountain bike pedals are not just for mountain bikes. They can be used on any bike! The salient features are that they are double sided; easy to click into, even easier to detach from, and use a small metal cleat secured by 2 bolts. This 2-bolt cleat defines the shoes that can used with these pedals, and 95% of them will have a lugged outsole that the cleat is recessed into, making for a flat and secure walking surface underfoot. The overarching design principle is easy entry and exit and off-bike walkability.
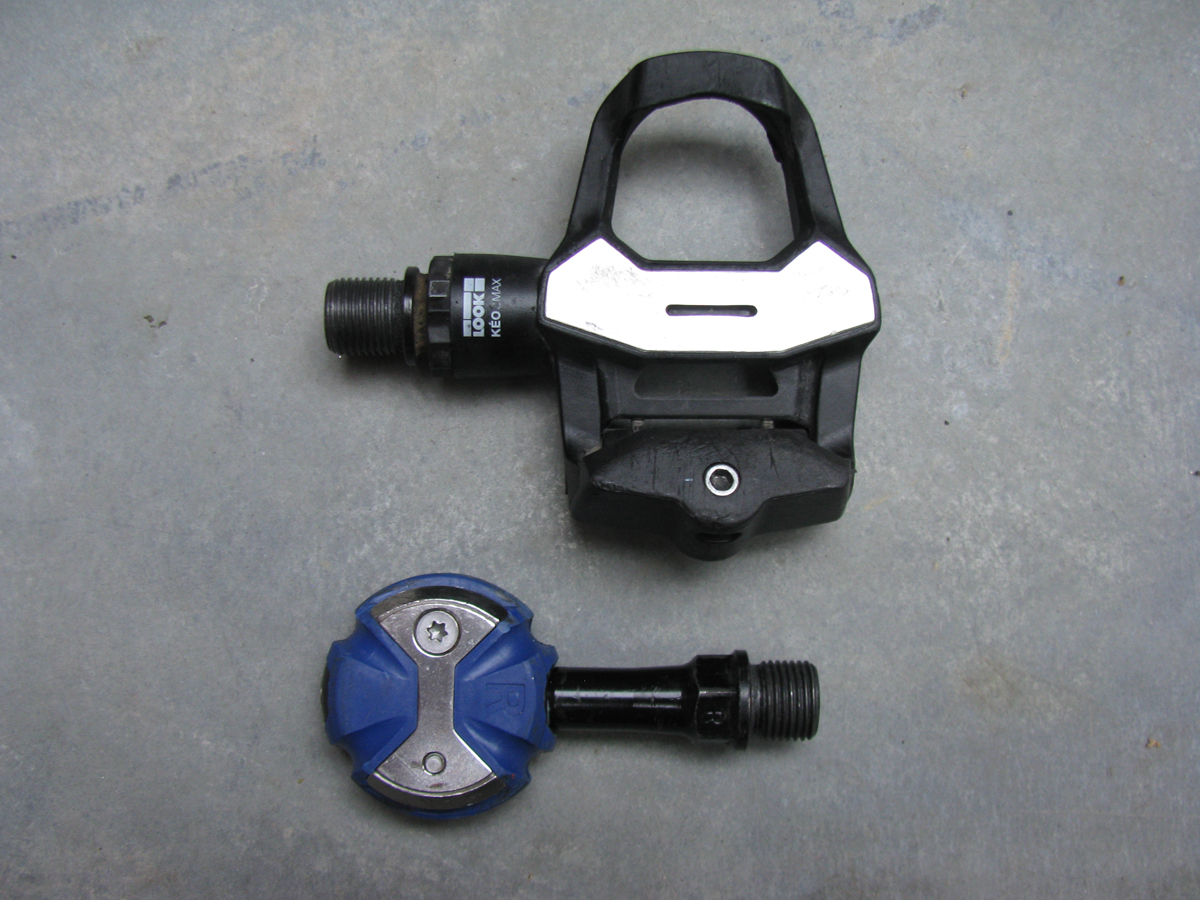
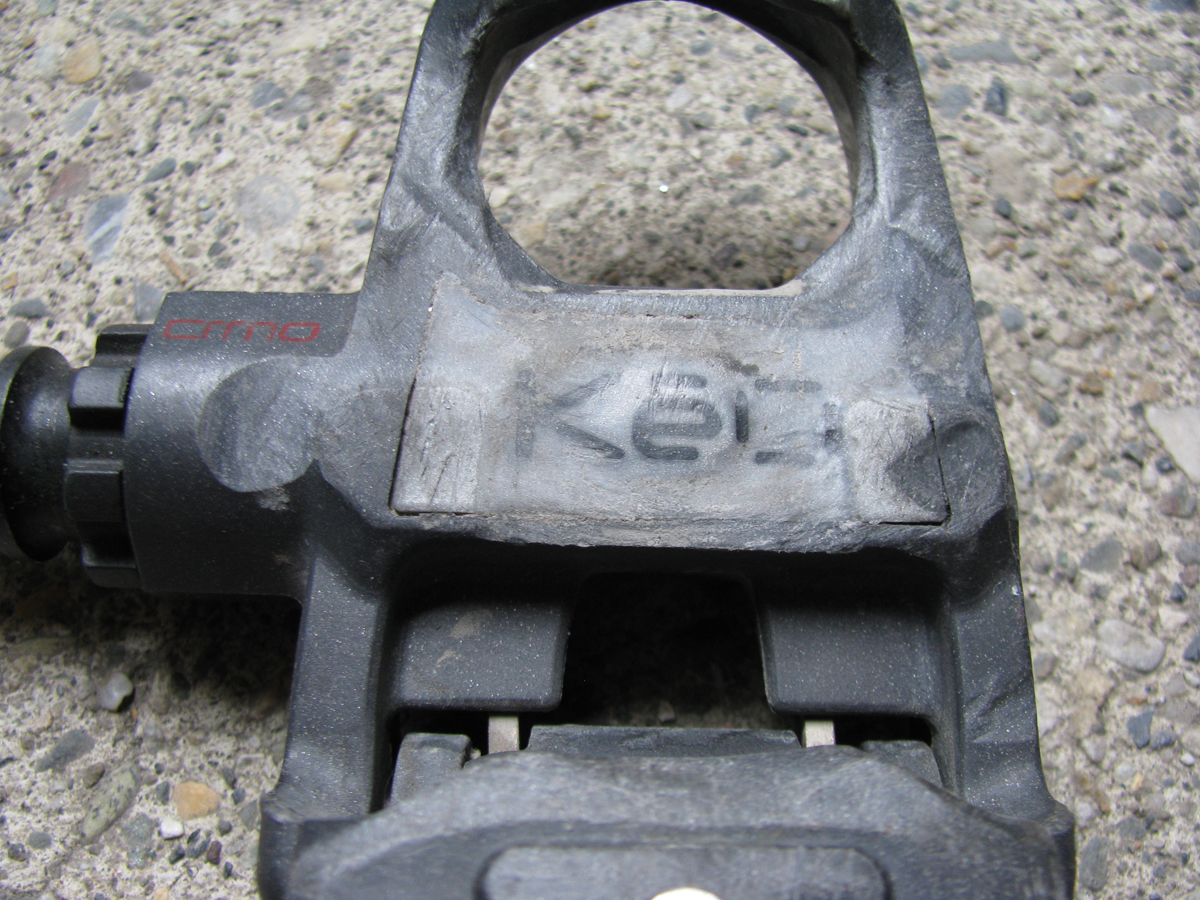
Road bike pedals are commonly single sided (the exception being the Speedplay brand of lollipop pedals), and relative to mountain bike pedals they can take more force to enter and exit. The cleats are larger, usually plastic, and use 3 bolts to mount to the shoes. The relevant cycling shoes will have a relatively smooth outer-sole, from which the cleat will protrude, making walking somewhat awkward. The overarching design principle is “retention” i.e. keeping your shoes attached to the pedal. Ease of engagement / disengagement is a secondary consideration.
Brands and Models
A few well-known brands dominate the market, but there is a wide array of options. The big names for road pedals are Shimano, Look and Speedplay, with Time a distant 4th. There are a multitude of second tier brands offering “Look compatible” pedals and cleats, but the quality and function is often not as good. All major brands offer a range of models at different price points with different materials and features. As with anything bicycle, your pay more for less (weight), and hopefully better quality.
Mountain bike pedals are dominated by Shimano who invented them, with Crank Bros a popular alternative. Other brands include iSSi, Xpedo, and Speedplay. Shimano offer a slew of options in weight, materials, quality and contact size, but not color! Some of the other brands bring more bling to your bike, should that be a selection criteria.
Pedal Functions
The two main functions to consider are ease of engagement and disengagement between cleat and pedal, and if off-bike walking practicality is needed.
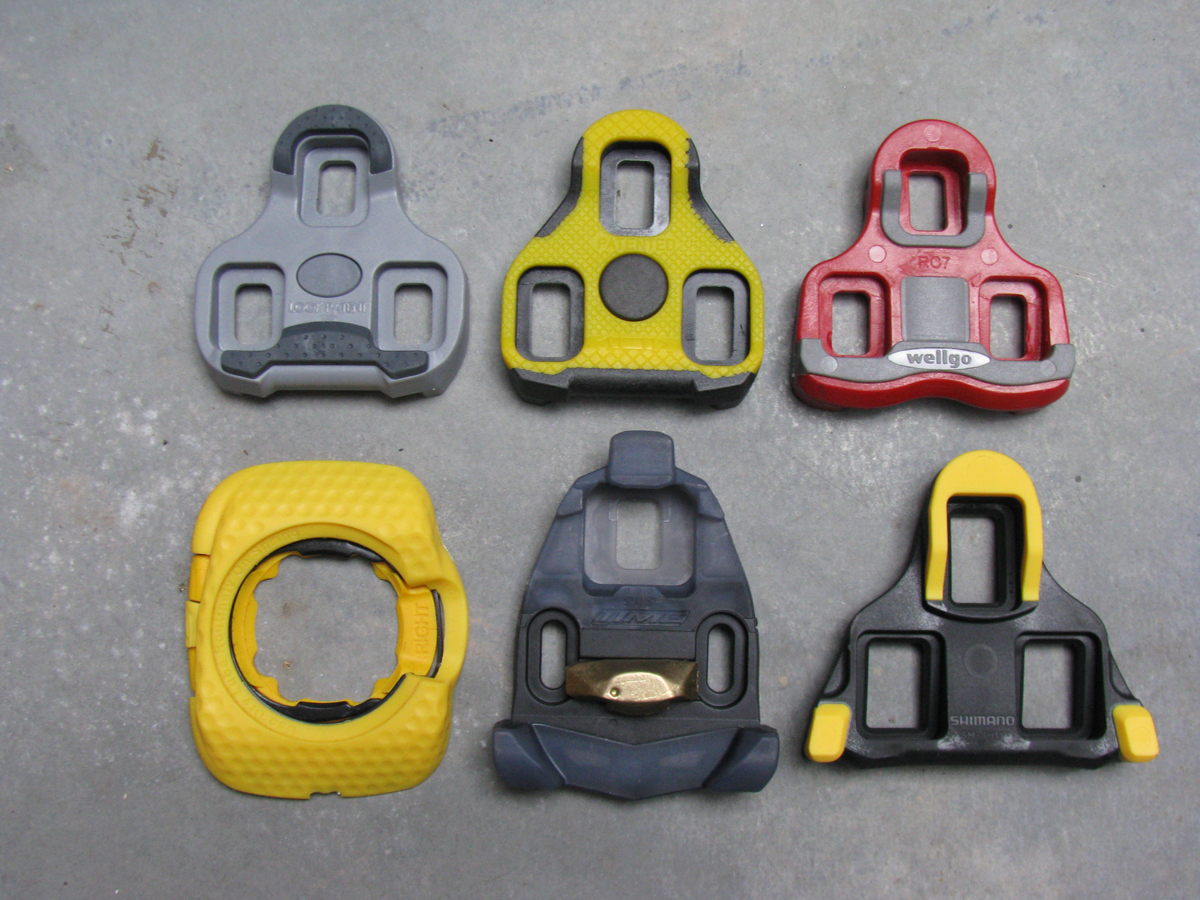
Engagement and disengagement. Connecting your shoe to the pedal takes practice, and while you can attach one foot while stationary, you have to be moving to get the other foot in. Double sided pedals make this easier. Mountain bike style pedals are easier. Most pedals have an adjustable tension screw that can be backed off to make this easier, or tightened to increase the grip the pedal has on the cleat. However different pedals have different characteristics. Shimano road pedals can take a lot more stomp to get in and out of compared to Look and Time and for that reason suit heavier stronger riders more than lightweights. Speedplay Zero are harder to get in and out of than Speedplay Ultra Light Action. If you are a novice, a pedal that is easy to get in and out of will suit you better.
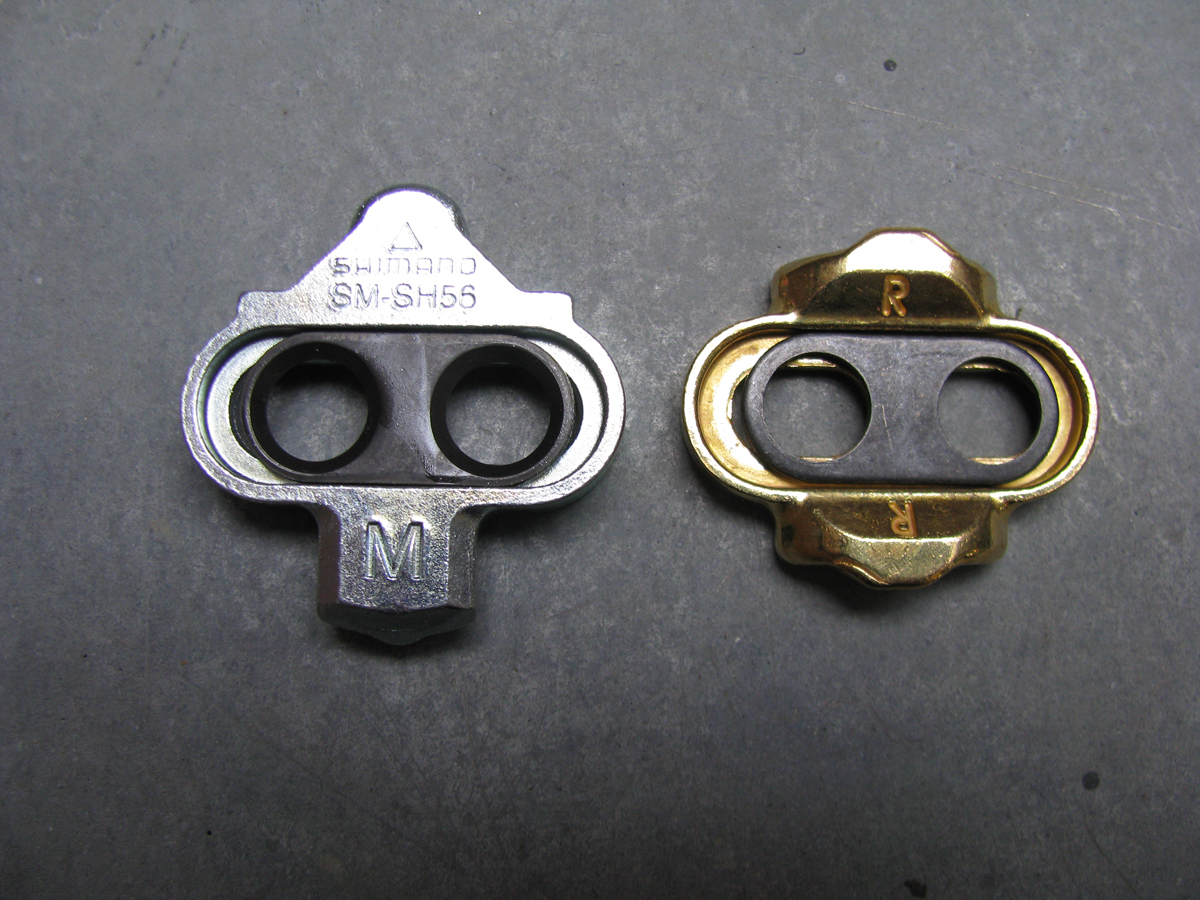
Walkability. OK, I know the aim of cycling is to be pedaling not walking, but for some people the need for good walkability will influence a pedal choice. Mountain bike pedals and shoes offer the best walkability and so are popular choices with commuters, bikepackers, and some novices. Road shoes and pedals will offer a limited amount of traction off the bike, with the best being the Speedplay walkable pedals. These are popular with triathletes who want secure footing in and out of transition zones while wearing road or tri shoes. Spin class aficionados may also value walkability, and to that end spin class bikes typically use either flat pedals or hybrid pedals that use a Shimano mountain bike cleat.
Pedal Features
There are a number of obvious and not so obvious features that may influence your preference and choice.
Connection. There are 3 options when it comes to defining the connection choices on a bike: single sided, dual sided and hybrid. Most road bike pedals are single sided. That means you can only connect your cleat to one side of the pedal. This keeps the weight and profile of the pedal lower. The downside is that without a foot in the pedal it usually rotates upside down, requiring a toe flick to turn it over before you can get in. Not an issue if you are getting on your bike, going for a ride, and getting off. It is an issue if during the course of a ride you have frequent stops and have to get going again quickly and easily. Double sided pedals are easier to get into without having to nudge it around to gain entry, but may be heavier and bulkier. The exception is Speedplay road pedals which are lightweight and double sided. All mountain bike pedals are double sided, but there are some single sided road pedals that use a metal mountain bike cleat. Hybrid pedals are a double-sided pedal with a different connection on each side – usually a combination of flat and mountain meaning you can use the pedals with regular shoes and no cleats, or cycling shoes and cleats. These are popular with commuters or people with one bike for quick errands as well as longer fitness or training rides. They are often recommended to cyclists moving from flat pedals to click in for the first time, although this is not always a good recommendation. The pedals are heavier and effectively a single sided pedal as far as clicking in goes. Once the skill of using click in pedals is mastered, the flat side becomes superfluous.
Float. To prevent achy knees, pedals and cleats are designed with “float”. This enables your heel to pivot slightly in and out during the pedal stroke. The model of cleat will determine the float. When you buy pedals, the box comes with a set of cleats. Those cleats will have X degrees of float which will suit most people most of the time. With mountain bike cleats the float is a set amount in most brands. With road pedals there are often choices in cleat color which denotes different amounts of float. For example, Look Keo grey cleats have 4.5 degree of float and the red cleats have 9 degrees of float. You may be a candidate for either more or less float than what the supplied cleats permit.
Fit Adjustments. You probably won’t give this any consideration at all, but as a bike fitter it is of considerable interest and relevance to me. The ability to adjust the relationship of the foot to the pedal via the cleat position is a key component of bike fitting. Adjustments include the fore-aft cleat position (how far forward your foot is over the pedal); the medial- lateral position which affects stance width; the cleat rotation which affects the usable float range; and the ability to shim or wedge a pedal to accommodate feet or leg conditions. Stance width (how far apart your feet are on the pedals) is a big deal for some cyclists, and for some cyclists wider is better. This can be achieved through the use of different length pedal spindles (axles) or aftermarket pedal extenders. Shimano recently introduced an option for 4mm longer spindles on their Ultegra and DuraAce models of road pedal; iSSi offers 2 additional length options on their mountain bike pedals, and Speedplay has long offered 4 additional different pedal spindle lengths.
Power Meter. Pedals have become a vehicle for power meters, with well-known USA company Garmin and lesser known Italian company Favero offering road pedals with built-in power meters. The Favero Assioma has proven to be reliable and popular, with their single sided pedal power meter having the lowest entry cost to getting power data out of all the power meter options available. From a technical perspective pedals are considered the least desirable place to have a power meter, but they offer the convenience of easy DIY installation, low cost and ease of transfer between bicycles.
Quality, Durability and Maintenance. Pedals and cleats are things most people put on and forget about, but they take a pounding every time you go riding. Shimano have the reputation for the best quality, long lasting pedals, but that’s not to say other brands are going to fall apart under your feet. Most but not all pedals are serviceable i.e. can be pulled apart, cleaned, greased and rebuilt, but many people will replace rather than repair pedals. Speedplay are the most serviceable, but also require regular maintenance in the form of greasing and cleat lubing which many users overlook. Pedals can and do wear out. That may be the internal bearings, or the external body. A badly worn pedal body leads to shoe-foot instability on the pedal which can show up as power loss and knee pain. Inspect old pedals for signs of excessive wear. Give them a spin by hand. If there is any grittiness to their rotation have them serviced or replaced. I’ve been stranded miles from home by a pedal that decided its day was done and seized up. You can ride a bike without a saddle, but you cannot ride a bike without a pedal that goes around. Cleats are designed to wear out. Expect a season or two out of them. Inspect them for missing screws, loose screws and wear, and replace them sooner than later.
Getting Started with New Pedals
Anyone who currently rides on flat pedals but is contemplating a performance upgrade to click-in pedals have heard the horror stories of pain and embarrassment from toppling over at a standstill in front of other cyclists and motorists, due to forgetting to disengage in a timely and balanced manner. Yes, it’s probably going to happen to you at some stage so consider it a rite of passage. There is a short learning period, but you most likely won’t regret the change. It’s part of becoming “one” with your bicycle. If you are nervous about this and on a road bike, I suggest starting with mountain bike style shoes and pedals for a gentler learning curve. If you are a cautious or relatively low skilled mountain biker and regularly put a foot down, stay on flat / platform pedals. If you build skill and confidence and want to stay on your bike more often, give click in mountain bike pedals a go.
To build skill and confidence using these pedals, start in a safe, controlled environment. If you have an indoor trainer, mount your bike on it and use it to practice getting in and out of the pedals. If you don’t, have someone hold you upright on your bike or lean against a wall or fence and practice getting in and out of the pedals. Releasing should be a simple outward twist of the heel. The next step is to find an open grassed park where you can ride around slowly and click in and out. Start at a standstill. Straddle your bike. Get one foot in a pedal, then push off to get the other foot in. You might need to do a few pedal strokes with just one leg before you can get the other foot connected. Practice engaging and disengaging on both sides. One side will feel more natural than the other, but it is good to be able to do it on both sides. If you fall over it will be a relatively soft landing. The next progression is to practice getting in and out while carrying some momentum along a street that trends gently down – so you don’t have to pedal. See if you can locate the pedal and click in without having to look down.
Once out and about the key to not falling over when coming to a stop is simply one of anticipation. Know which foot you want to put down when you stop, disengage from the pedal a few yards before you come to a stop, and as you finish braking lean to that side and put your already detached foot on the ground. If you lose too much speed before disengaging then the action of getting your foot out will tip you out of balance and you will fall over before your foot is free of the pedal. For most pedals you “toe” into the pedal to connect, and twist your heel out to release.
With practice this will become an automatic and largely unconscious action, and you will wonder why you didn’t make the change sooner!
John Higgins is a professional bike fitter and purveyor of unique and boutique bicycles and fit-related components and accessories in Salt Lake City. More info on bikefitr.com
