By Tom Jow
The great thing about bicycles is that they can last a long time. Old bikes come into the shop all the time that look like they haven’t had a day of maintenance, chains rusty, wheel bearings dry and grips falling off that are being ridden every day. On the opposite end of the spectrum, race bikes are replaced once or twice a year, get washed and tuned after every race and have their cables and chains replaced each week. Now as much as we’d all like to, most of us are not going to get a new bike every year; probably not even every other. There is, however, something we can do to get our trusty steed riding like new again: an overhaul.
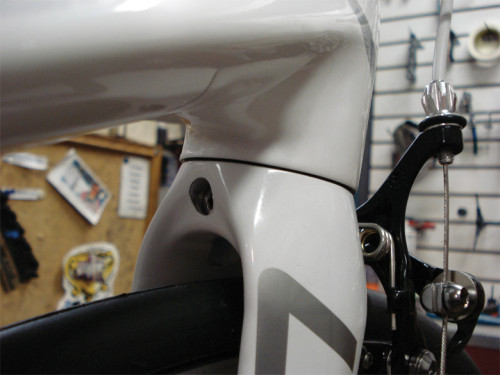
What is included in an overhaul and how often should it be done? An overhaul is a comprehensive service during which the complete bike is disassembled, bearings cleaned or replaced, drivetrain cleaned and cables and housing replaced. After reassembly, every system is tuned to perfection. Depending on how often the bike is used and under what conditions, an overhaul could be required once a year, every other year, or every 3000 miles. Unfortunately, an overhaul is not cheap. Costing around $200 labor (or more), add parts and this service can be tough on the pocket book. It is possible though, to spread the repair cost out by servicing groups of components at different periods throughout the year. In order to do this, however, it is important to be able to determine what needs to be serviced and when. Let’s look at the major component groups and learn how to inspect each for wear and determine when they might need service.
Headset:
To inspect the headset, lift the front of the bike by the handlebars and slowly rotate to the left and right. The movement should be smooth and quiet. Then, with the wheels on the ground, grasp the front brake and press forward and back against the locked front wheel.
Any gritty, crunching sounds may indicate bearings that are dry or dirty. The lower headset bearings are easily contaminated by dirt and water. The feeling of an index, or notch, in the steering while facing forward indicates a headset that may need replacement due to the bearing races being dented from any combination of age, rough roads and maladjustment. If there is any movement or “clunking” while pressing against the front brake, the headset probably needs adjustment, if not more.
Bottom Bracket:
Remove the chain and slowly rotate one crank arm forward or backward. The rotation on a good bottom bracket will be quiet and smooth enough to use one finger. There should be just a little resistance from grease and seals. Dry bearings spin smooth and fast, and with a slight hum as they are spun faster. Dirty bearings sound gritty and rough. Then grasp a crank arm and attempt to move it laterally (like pulling on a slot machine). Cartridge bearing bottom brackets are no longer serviceable. When it’s bad, it’s time for a new one.
Wheels:
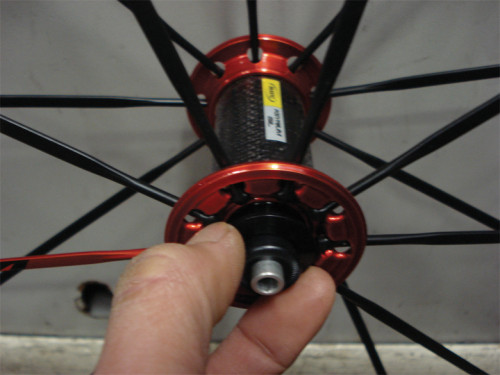
Spin each wheel and watch it between the brake pads (or frame with disc brakes). If the rim moves side to side while rolling, this indicates a need for a spoke adjustment (truing) or a spoke replacement. Then, remove each wheel and rotate the axle between the thumb and forefinger. Grip the axle end with the fingers and try to wiggle it up and down. The wheel bearings will need maintenance if they feel dry, rough or loose. On rear wheels, rotate the freehub/freewheel slowly counter-clockwise. A freehub that needs to be serviced or replaced does not rotate easily in the coasting direction. A chain that sags while coasting at high speed is a better indicator of poor freehub performance.
Brakes:
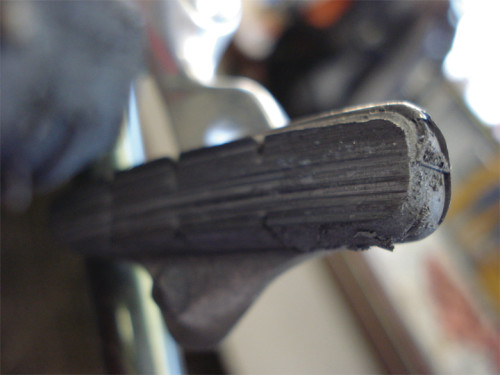
Inspect the brakes by squeezing and releasing the brake levers slowly. They should operate smoothly and completely. If they are slow to return, the cables and housing could be dirty or worn out. Check cables for fraying and housing for cracks. Due to their contribution to safety, it is a good idea to replace brake cables at least every couple years, if not more often. Also examine the brake pads. Caliper brake pads have grooves that, when shallow, indicate the need for replacement.
Hydraulic brakes are a little different. When they are sluggish they usually have a dirty main pivot or damaged lever blade. Hydraulic brake lines also should be crack free and with no leakage along hoses, at connection points, or around brake lever or reservoir. Any leaks should be serviced immediately. Hydraulic brake levers that can be pulled to the handlebar indicates a need for service, a full bleed with parts or something as simple as new brake pads. Disc pads should be replaced when 2mm thick or less.
Shifting:
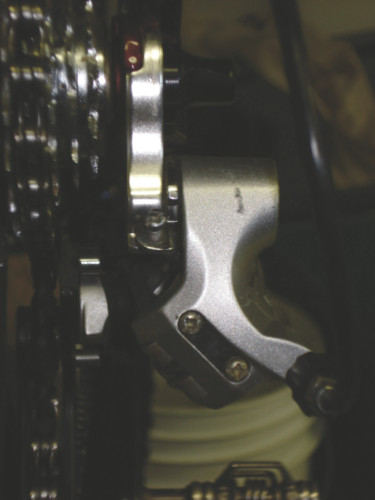
As with brake cables, shifting cables should have no visible fraying and the housing should be free from cracks or kinks. Visually inspect the derailleurs for signs of damage, especially if the bicycle has been in any crashes. Check the derailleur hanger for alignment vertically. Rear derailleur pulleys should spin smoothly, with no signs of excessive wear or cracks.
It is usually very obvious when the shifting system is not working well. Ninety percent of the time replacing the cables and housing will restore function. Do keep in mind that new cables and housing always need a readjustment after a few rides. Therefore, if shifting is slow to the easy cogs, a little more tension on the cable is usually warranted. A chain that goes into the spokes on an otherwise well adjusted rear derailleur probably has a bent derailleur hanger. Rear derailleur pulleys with excessive rolling resistance can sometimes be cleaned and re-lubricated,. The better ones have cartridge bearings and when they go bad, they must be replaced.
Check the rear derailleur hanger for alignment.
Drivetrain:
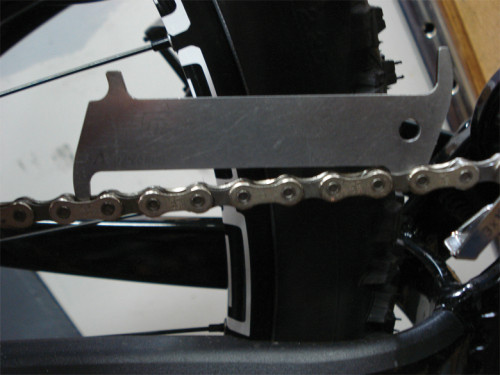
The chain, chain-rings and cassette function essentially as one unit. Replace one and it is likely to require replacing the others. Use a chain gauge to measure the amount of wear on the chain. Visually inspect the chain for twists or links that stick. Bent or twisted chains often have a pin that is pulling out. Examine the chain-rings for wear. When worn, the chain-ring teeth begin to look like the dorsal fin of a shark. The larger two rings often outlast the granny gear two-fold. On mountain bikes, however, the large ring is subject to irreparable damage in collisions with stumps, logs and rocks. Spin the cassette slowly and check each cog for bends or cracks. With the popularity of 10 and 11 speed cassettes the cogs have become much thinner and at greater risk of damage.
When the chain gauge slips completely into the chain (flat), it is time to replace both the chain and cassette. By replacing the chain at earlier intervals cassettes last longer and shifting performance is extended. Any bent or damaged part should be replaced as soon as possible in order to restore a shifting performance. Keeping the chain clean and properly lubricated will enhance performance and ride quality.
Frame, seatpost, handlebar, etc.:
These parts are often overlooked during the normal tune-up process. Inspect these components for cracks, dents and bends. Any of these conditions is a major safety issue and should be addressed immediately. Remove the seatpost from the frame and clean it, and the inside seat tube. Also clean the seatpost clamp. Re-lubricate the seat tube with grease (metal-metal) or carbon assembly paste. Treat yourself to new bar tape or grips.
Whether it’s done once a year or every 3000 miles, if you ride regularly, a complete overhaul is in your future. As I’ve said before, winter is a great time to have major service performed. An overhaul can be a little expensive when done all at one time, and maybe that’s just not in the budget. With what we’ve just learned, you can decide (or negotiate over) what components need to be serviced right away and defer others to spread the cost out over more time.
Got a bike question? Email Tom at 1tomjow@gmail.com.




Chains are often the hardest part on our bikes and I learned how to assemble the bike back into the derailleur including the important connections. How do you safely adjust the bike chain on the Derailleur? First raise your bike wheel, chain your bike over the derailleur that glides behind the bike and around the front sprocket. Let go of the derailleur that follows and secures a well-fitting bike. Adjust your bike by the small part of the front gear, rotate the handle to run into the rope, connect the two links.
you can do it in the comfort of your own home with the right gears and knowledge. Just avoid putting your fingers in the chain and always wear protective gloves when you’re at it.
Most journeys start as simple dreams to go and let loose on a bike for a while and see what happens. Unnecessary complications too often bring them down.
So true!
During college, I worked for a summer in an old folks home.
Many of the elderly patients regretted not having fulfilled their dreams. And now they were bedridden and just waiting to die.
It was very confronting to hear them talk about it – and it really made me think about how so many people put off doing what they dream of until it’s too late.
One of the most common problems that you can face with brakes is broken and bent bike cables. It means your brake may not deliver well, which causes you to lose control while riding. Good thing, you can learn how to fix bike brakes cable. Simple ways include proper cleaning and lubricating of the cables, replacing them successfully, and testing for biking.
Comments are closed.