By Tom Jow
Now that warmer weather has returned it’s time to get the bike ready to roll. After the bikes are clean, chains are lubricated, tires have been inflated… did you check your repair kit?
Being half way through a ride is a bad time to discover that the tube you thought was a spare has a hole in it from last time. When was the last time (if ever) the chain tool was used? Still remember how to use it? Maybe you just purchased a new bike and don’t have a repair kit yet. What are the essential components of an on the bike repair kit and how are they used?
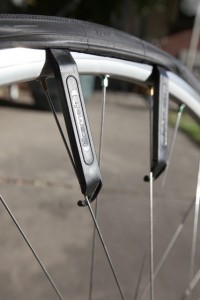
The most important parts of any repair kit is a spare tube, patch kit, pump and tire levers. A punctured tube is the most common repair performed on the road or trail. Tubes come with two types of valves, schrader (like a car) and presta. In addition, valve lengths and tube widths vary for rim depth and tire width so it is important to get the correct size. Pumps also come in a variety of sizes to fit on the frame or in a hydration pack. Be sure that the pump you have is set up to work with the tube valve on your bike. Tire levers cost about $5 and are necessary to remove the tire, especially if it fits tight on the rim. You may also want to carry a tire boot – a piece of casing from an old road tire or sidewall from an mtb tire measuring approximately 2” x 4”. If your tire is badly cut on a ride, this lightweight addition to your kit can be used between the tire and the tube to get you home. A mylar energy bar wrapper or folded dollar bill can work in a pinch.
Once a new tube is installed, there are two ways to inflate it. The old standard way is with a pump.
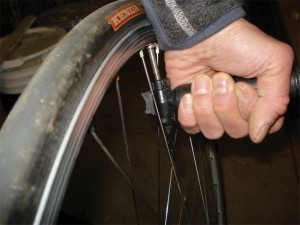
Place the pump on the valve and lock it on. When pumping, it is helpful to keep the pump perpendicular to the valve to prevent air from leaking out of the seal. Also, support the head of the pump to prevent it from slipping through the spokes, tearing the valve off the tube. An easier way to inflate the tube is with a CO2 inflator.
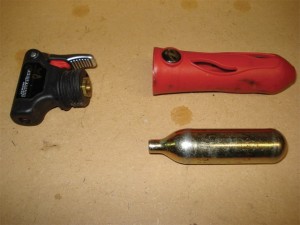
This device is essentially a compressed air cartridge with a nozzle to fit a bicycle tube. Just as bicycle tires and tubes come in widths, CO2 cartridges come in different sizes to accommodate those sizes. This can be a little confusing sometimes, but a bigger drawback is the requirement of one cartridge per inflation. That means you must carry one cartridge for each flat tire you plan on having during a ride. Despite this, a CO2 inflator is a convenient tool to have.
Another tool that is good to have along is a multi-tool. The “Swiss-Army knife” of bike tools, these units come equipped with anywhere from 5 to 20 different instruments to perform repairs out on the road or trail. A mandatory tool for mountain bikers is a chain tool. Whether attached to a multi-tool or a stand alone unit, you’ll need one of these to repair your chain if it breaks on the trail. They are easy to use if you carry a repair link. Just push out the pin of the broken link and install the repair link. Without it, it can be a long walk back to the car.
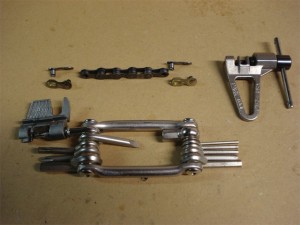
Finally, we need a way to carry these tools and anything else we may want on the way such as id, food, or money. Riders that use a hydration pack already have a place to put it. Cycling jerseys were designed with pockets in the back for just this purpose. A small pouch under the seat is nice because it is there every time you ride. Use the smallest size possible to reduce rattling of the parts inside while riding.
A well prepared repair kit is an accessory that every cyclist needs to have. It can be simple as outlined above, or stocked with additional parts such as chain-ring bolts, cables, spokes, you name it. The farther you ride, the more stuff you might need. The important thing is that just like your bike, prepare it well, keep it in order and it will help you enjoy riding no matter what happens.
Got a bike question? Email Tom at 1tomjow@gmail.com.

